The Ultimate Guide to Contouring: Slim Your Face by 15%
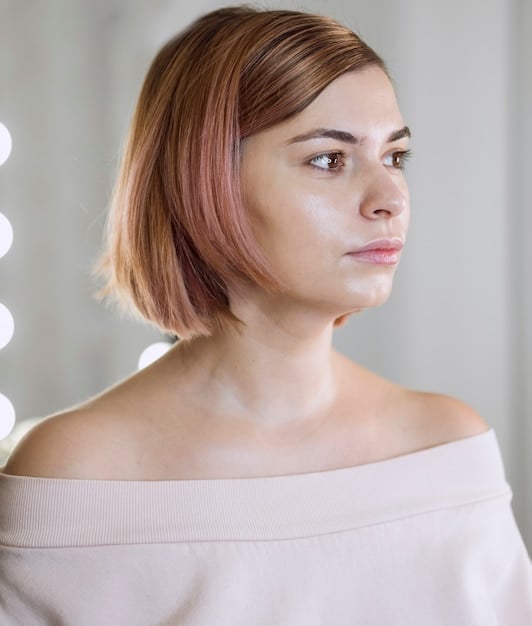
The ultimate guide to contouring for your face shape offers a comprehensive approach to sculpting your features, providing step-by-step instructions and expert tips to achieve a more defined and slimmer look, enhancing your natural beauty.
Want to learn how to sculpt your face like a makeup artist? The ultimate guide to contouring for your face shape: achieve a 15% slimmer look is here to help. Discover the secrets to enhancing your features and creating a flawless, defined appearance with our expert tips and techniques.
Understanding the Basics of Contouring
Contouring is a makeup technique that uses shading and highlighting to enhance facial features. By strategically applying darker and lighter shades, you can create the illusion of depth and dimension, making your face appear slimmer and more sculpted.
This guide will walk you through the fundamental principles of contouring, ensuring you understand how to use this technique effectively. Mastering these basics is crucial for achieving professional-looking results.
What is Contouring and Why Do It?
Contouring involves using makeup to create shadows and highlights on the face. Darker shades, typically matte bronzers or contour powders, are used to create shadows, while lighter shades, like highlighters, are used to bring light to certain areas.
The primary goal of contouring is to enhance your natural features and correct perceived imperfections. It allows you to sculpt your face, making your cheekbones appear higher, your jawline more defined, and your nose slimmer. Contouring can also help to balance asymmetrical features, creating a more harmonious overall appearance.
Essential Tools and Products for Contouring
To achieve a flawless contour, you’ll need the right tools and products. Here’s a list of essentials:
- Contour Powder or Cream: Choose a shade that is two to three shades darker than your natural skin tone. Matte formulas work best for creating realistic shadows.
- Highlighter: Select a highlighter that complements your skin tone. Options include powder, cream, or liquid formulas.
- Contour Brush: An angled contour brush is ideal for precise application along the cheekbones and jawline.
- Highlighting Brush: A fan brush or small tapered brush is perfect for applying highlighter to the high points of your face.
- Blending Sponge or Brush: Essential for seamlessly blending the contour and highlighter into your skin.
By investing in high-quality tools and products, you’ll be well-equipped to create a professional and polished contour.
Understanding the basics and having the right tools sets the stage for effective contouring, enhancing your natural features with precision and skill.
Identifying Your Face Shape
Before you start contouring, it’s essential to identify your face shape. Different face shapes require different contouring techniques to achieve the most flattering results. Understanding your face shape will guide you in where to apply contour and highlight for optimal definition.
Each face shape has unique characteristics, and knowing yours will help you tailor your contouring routine to accentuate your best features. Let’s explore the most common face shapes and how to identify them.
Common Face Shapes and Their Characteristics
There are several common face shapes, each with distinct characteristics:
- Oval: An oval face is longer than it is wide, with a gently rounded jawline and forehead.
- Round: A round face has similar width and length, with soft, curved features and a full cheek area.
- Square: A square face is characterized by a strong, angular jawline and a relatively equal width across the forehead, cheekbones, and jaw.
- Heart: A heart-shaped face features a wider forehead that tapers down to a narrow, pointed chin.
- Diamond: A diamond-shaped face has wide cheekbones and a narrow forehead and jawline.
How to Determine Your Face Shape
Determining your face shape can be easy. Here’s a simple method:
- Measure Your Face: Use a measuring tape to measure the width of your forehead, cheekbones, and jawline. Also, measure the length of your face from your hairline to your chin.
- Compare Measurements: Analyze your measurements to determine which areas of your face are widest and longest.
- Examine Your Features: Look at the shape of your jawline and chin. Are they rounded, angular, or pointed?
- Consider Overall Proportion: Assess the overall balance of your face. Is it longer than it is wide, or are the width and length similar?
Once you’ve completed these steps, you should have a clear idea of your face shape. Knowing your face shape is crucial for tailoring your contouring technique.
Identifying your face shape is a critical step in mastering contouring, allowing you to apply makeup in a way that enhances your unique features and creates a more balanced and sculpted appearance.
Contouring Techniques for Oval Faces
Oval faces are considered balanced, so contouring is primarily about enhancing existing features. The goal is to add subtle definition without drastically altering the natural proportions.
For oval faces, contouring can be used to accentuate the cheekbones and add a touch of warmth to the forehead and jawline. Let’s explore the specific techniques for oval faces.
Basic Contouring for Oval Faces
Contouring an oval face involves subtle shading to enhance the cheekbones and jawline. Here’s how:
- Cheekbones: Apply contour powder or cream along the hollows of your cheekbones, starting from your ear and blending towards the corner of your mouth.
- Forehead: Lightly contour along the hairline to add warmth and dimension to the forehead.
- Jawline: Apply a small amount of contour along the jawline to create subtle definition.
Highlighting for Oval Faces
Highlighting an oval face involves accentuating the high points to enhance your features. Here’s how:
- Cheekbones: Apply highlighter to the tops of your cheekbones to enhance their natural projection.
- Bridge of the Nose: Apply a small amount of highlighter down the bridge of your nose to create the illusion of length.
- Cupid’s Bow: Highlight your Cupid’s bow to define your upper lip and create a more youthful appearance.
Contouring and highlighting for oval faces should be subtle, focusing on enhancing natural features rather than dramatically altering the face shape.
By following these techniques, you can enhance the natural balance of your oval face, adding definition and dimension without overpowering your features.
Contouring Techniques for Round Faces
Round faces benefit most from contouring techniques that create the illusion of angles and definition. The primary goal is to make the face appear slimmer and more sculpted.
Contouring a round face involves strategically applying shading to create shadows and definition. Highlighting adds dimension to the high points of the face, enhancing the overall effect. Let’s dive into the techniques.

Creating Angles on a Round Face
To create angles on a round face, focus on defining the cheekbones and jawline. Here’s how:
- Cheekbones: Apply contour powder or cream along the hollows of your cheekbones, starting from your ear and blending towards the corner of your mouth. This will create the illusion of higher, more defined cheekbones.
- Sides of the Forehead: Contour along the sides of your forehead to narrow the overall appearance of your face.
- Jawline: Apply contour along your jawline to create a more defined and angular jaw. Blend well to avoid harsh lines.
Highlighting to Enhance Definition
Highlighting is essential for enhancing the definition created by contouring. Here’s how to highlight a round face:
- Center of the Forehead: Apply highlighter to the center of your forehead to draw attention upwards and create the illusion of length.
- Bridge of the Nose: Highlight the bridge of your nose to make it appear longer and thinner.
- Chin: Add a touch of highlighter to the center of your chin to create balance and enhance overall definition.
Contouring and highlighting are powerful tools for adding definition to a round face, creating a more sculpted and balanced appearance.
By mastering these techniques, you can effectively contour your round face, creating the illusion of angles and definition for a more sculpted and balanced look.
Contouring Techniques for Square Faces
Square faces are characterized by strong, angular features, particularly a prominent jawline. Contouring aims to soften these angles and create a more balanced appearance.
The goal of contouring a square face is to soften the jawline while enhancing the cheekbones and forehead. By strategically applying contour and highlight, you can create a more harmonious and balanced look. Here’s how:
Softening a Strong Jawline
To soften a strong jawline, focus on contouring the corners of your jaw. Here’s how:
- Corners of the Jaw: Apply contour powder or cream to the corners of your jawline to soften the angles. Blend well to avoid harsh lines.
- Cheekbones: Contour along the cheekbones to add definition, starting from the ear and blending towards the mouth.
Highlighting to Balance Features
Highlighting can balance the strong angles of a square face. Here’s how:
- Center of the Forehead: Apply highlighter to the center of your forehead to draw attention upwards and create the illusion of length.
- Tops of the Cheekbones: Highlight the tops of your cheekbones to enhance their projection and create a more sculpted look.
- Center of the Chin: Add a touch of highlighter to the center of your chin to soften the jawline further and create balance.
Contouring and highlighting are key to softening the angular features of a square face, creating a more balanced and harmonious appearance.
By strategically contouring and highlighting, you can soften the strong angles of your square face, achieving a more balanced and harmonious appearance.
Common Contouring Mistakes to Avoid
Even with the best techniques, it’s easy to make mistakes when contouring. Avoiding these common pitfalls will ensure your contour looks natural and enhances your features rather than detracting from them.
Many contouring mistakes stem from choosing the wrong products, applying too much product, or failing to blend properly. By understanding and avoiding these common errors, you can achieve a flawless and natural-looking contour. Let’s explore these mistakes and how to avoid them.
Choosing the Wrong Shade
One of the most common contouring mistakes is choosing a shade that is too dark or too warm. A contour shade should mimic a natural shadow, so it should be cool-toned and only two to three shades darker than your natural skin tone.
Using a shade that is too dark can create harsh, unnatural lines, while a shade that is too warm can look muddy. To avoid this mistake, test the contour shade on your skin before applying it to your face. Look for cool-toned contour powders or creams that blend seamlessly into your skin.
Applying Too Much Product
Applying too much product is another common contouring mistake that can lead to a heavy, unnatural look. It’s always better to start with a small amount of product and build up the intensity as needed.
Use a light hand when applying contour, and blend well after each application. If you accidentally apply too much product, use a clean blending sponge or brush to soften the lines and remove excess product. Remember, less is often more when it comes to contouring.
Failing to Blend Properly
Failing to blend properly is perhaps the most common contouring mistake of all. Unblended contour lines can look harsh and unnatural, making your makeup look unfinished.
To avoid this mistake, invest in a high-quality blending sponge or brush, and take the time to blend your contour seamlessly into your skin. Use swirling motions to blend the edges of the contour into your foundation, creating a smooth and natural transition. Proper blending is key to achieving a flawless contour.
Avoiding these common contouring mistakes will help you achieve a polished and natural-looking contour that enhances your features and creates a more sculpted appearance.
By steering clear of these common errors, you can ensure that your contouring efforts result in a flawless and natural-looking enhancement of your facial features.
| Key Point | Brief Description |
|---|---|
| ✨ Face Shape | Identify your face shape (oval, round, square) for tailored contouring. |
| 🖌️ Contour Placement | Apply contour to cheekbones, forehead, and jawline based on your face shape. |
| 🧽 Blending | Blend contour and highlight for a seamless, natural finish. |
| 🎨 Products | Use matte contour and highlighter shades suited to your skin tone. |
FAQ About Contouring
▼
Contouring enhances facial features by creating shadows and highlights, adding depth and dimension. It can sculpt cheekbones, define the jawline, and slim the nose, providing a more refined look.
▼
Select a contour shade two to three shades darker than your skin tone, with cool undertones to mimic natural shadows. Avoid warm or orange tones, which can look unnatural.
▼
Essential tools include a contour brush (angled for precision), a highlighter brush (fan or tapered), and a blending sponge or brush to seamlessly blend the products into the skin.
▼
Contour along the hollows of the cheekbones, sides of the forehead, and jawline to create angles and definition. Highlight the center of the forehead, bridge of the nose, and chin.
▼
Use a blending sponge or brush and blend with swirling motions, ensuring there are no harsh lines. Blend until the contour seamlessly transitions into your foundation for a natural finish.
Conclusion
Mastering the art of contouring for your face shape can significantly enhance your natural beauty, creating a more sculpted and defined appearance. By understanding your face shape, using the right techniques, and avoiding common mistakes, you can achieve a professional-looking contour that boosts your confidence and elevates your makeup game.


