The Ultimate Guide to Self-Tanning: Achieve a Perfect Glow in 2 Hours

The Ultimate Guide to Self-Tanning provides a comprehensive overview of how to achieve a natural-looking, streak-free tan in just 2 hours, covering everything from product selection and skin preparation to application techniques and aftercare tips.
Dreaming of sun-kissed skin without the harmful UV rays? The Ultimate Guide to Self-Tanning: Achieve a Natural-Looking Glow in 2 Hours is here to transform your tanning game, making it easy to achieve a radiant, natural-looking tan from the comfort of your home.
Why Choose Self-Tanning?
Self-tanning has surged in popularity as a safe alternative to traditional sunbathing and tanning beds. But why should you consider self-tanning?
It’s all about achieving that desirable sun-kissed glow without exposing your skin to harmful ultraviolet (UV) radiation, which is a leading cause of premature aging and skin cancer.
The Healthier Alternative
Unlike basking in the sun or using tanning beds, self-tanners work by using dihydroxyacetone (DHA), a non-toxic sugar that interacts with the amino acids in the outermost layer of your skin. This reaction creates a browning effect, mimicking a natural tan without any of the UV-related risks.
Convenience and Control
Another significant advantage of self-tanning is the convenience it offers. You can achieve a tan at any time, regardless of the weather or season. Plus, you have complete control over the depth of your tan, allowing you to customize your glow to suit your preferences.
Here are some other reasons why self-tanning is a great option:
- Reduces UV exposure: Minimizes the risk of sunburn and long-term skin damage.
- Provides a customizable tan: Allows you to achieve your desired shade without overdoing it.
- Boosts confidence: Enhances your appearance, making you feel more confident and attractive.
Therefore, self-tanning is the ideal choice for those looking to maintain a healthy skincare routine while still achieving a beautiful, bronzed complexion.
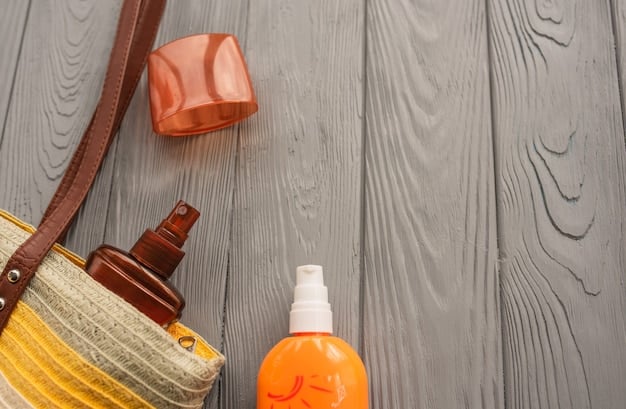
Understanding Self-Tanning Products
Navigating the world of self-tanning products can be overwhelming, with numerous formulations and brands vying for your attention. Knowing the differences between these products is crucial for achieving the best possible results.
Each type offers unique benefits and is suited to different skin types and preferences. Let’s explore the most common types of self-tanning products.
Lotions and Creams
Self-tanning lotions and creams are known for their moisturizing properties, making them excellent for individuals with dry or sensitive skin. They typically provide a gradual tan, allowing you to build up your desired shade over several applications. The hydrating ingredients help ensure an even application and reduce the risk of streaks.
Mousses
Self-tanning mousses are lightweight and airy, making them easy to apply and spread evenly. They often come with a tinted guide, which helps you see where you’ve applied the product, ensuring a uniform tan. Mousses tend to dry quickly, reducing the chances of transfer onto clothing and bedding. They are suitable for all skin types, particularly those with oily or combination skin.
Sprays
Self-tanning sprays offer a fine mist application, which can be particularly effective for reaching hard-to-reach areas like the back. They are quick-drying and provide a seamless, natural-looking tan. Sprays are an excellent choice for experienced self-tanners who prefer a hands-free application.
- Lotions: Best for dry skin.
- Mousses: Ideal for quick application.
- Sprays: Great for hard-to-reach areas.
Selecting the right self-tanning product is crucial for achieving a flawless, natural-looking tan. Consider your skin type, application preference, and desired level of tan to make the best choice.
Preparing Your Skin for Self-Tanning
Proper skin preparation is key to achieving a flawless, long-lasting self-tan. Skipping this step can lead to uneven color, streaks, and a tan that fades quickly. Here’s how to prep your skin for the best possible results:
Exfoliating and hydrating are the cornerstones of a perfect pre-tan routine. Let’s explore this in more detail.
Exfoliation
Exfoliating your skin before applying self-tanner removes dead skin cells, creating a smooth and even surface. This ensures that the self-tanner adheres evenly, resulting in a more natural-looking tan. Use a gentle exfoliating scrub or a loofah in the shower to buff away dead skin cells. Pay particular attention to areas like knees, elbows, and ankles, where skin tends to be drier.
Hydration
Moisturizing your skin is just as important as exfoliating. Dry skin absorbs self-tanner more quickly, leading to darker, uneven spots. Apply a light, oil-free moisturizer to your entire body 24 hours before tanning. Avoid using heavy lotions or those containing oils, as they can create a barrier that prevents the self-tanner from absorbing properly.
A well-prepared canvas ensures a more uniform and natural tan. Don’t skip these steps!
- Exfoliate: Removes dead skin for even application.
- Hydrate: Keeps skin smooth and prevents dark spots.
- Avoid Oils: Steer clear of oily lotions before tanning.
By following these skin preparation steps, you’ll create the perfect base for a flawless, long-lasting self-tan.
Application Techniques for a Flawless Tan
Achieving a flawless self-tan is as much about technique as it is about product. Proper application ensures an even, streak-free tan that looks natural and lasts longer.
Using the right tools and methods can make all the difference. Here’s a step-by-step guide to applying self-tanner like a pro.
Using a Tanning Mitt
A tanning mitt is an essential tool for applying self-tanner. It protects your hands from staining and helps to distribute the product evenly. Apply a small amount of self-tanner to the mitt and use long, sweeping motions to blend it onto your skin. Start with your legs and work your way up, using a light touch on areas like knees, elbows, and ankles. Remember to use a circular motion to blend the product seamlessly.
Layering for Depth
If you’re aiming for a deeper tan, consider layering the product. Apply a thin layer of self-tanner and allow it to dry completely before applying a second coat. This helps to build up the color gradually, reducing the risk of streaks and unevenness. Be sure to wait at least 4-6 hours between applications to allow the tan to fully develop.
Mastering application ensures an even, streak-free tan that looks natural and lasts longer.
- Tanning Mitt: Essential for even distribution.
- Sweeping Motions: Ensure smooth, streak-free tan.
- Layering: Build color gradually for a deeper tan.
By following these application techniques, you’ll be able to achieve a flawless self-tan that looks professional and natural.
Maintaining Your Self-Tan
Once you’ve achieved your desired tan, the key to maintaining it is proper aftercare. A well-maintained self-tan not only looks better but also lasts longer.
Hydration and gentle care are critical. Here’s how to keep your self-tan looking its best.
Hydration is Key
Keeping your skin moisturized is crucial for maintaining a self-tan. Apply a generous amount of moisturizer daily, focusing on areas that tend to dry out quickly, such as elbows, knees, and ankles. Hydrated skin retains the tan better, preventing it from fading unevenly. Choose a moisturizer that is oil-free to avoid interfering with the tan.
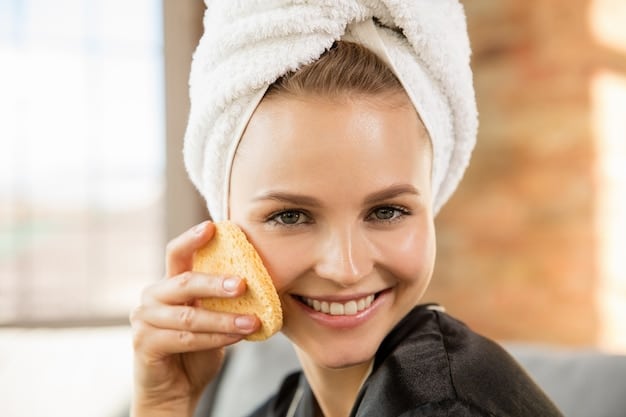
Gentle Cleansing
When showering, use a gentle, sulfate-free cleanser to avoid stripping away the tan. Harsh soaps and scrubs can cause the self-tanner to fade prematurely. Pat your skin dry with a soft towel instead of rubbing, which can also cause the tan to fade unevenly. Opting for gentle cleansing will help prolong your tan and keep it looking fresh.
With consistent care, your self-tan will stay radiant and natural-looking for longer.
- Moisturize Daily: Keeps skin hydrated and tan even.
- Gentle Cleanser: Prevents premature fading.
- Pat Dry: Avoid rubbing to maintain the tan.
By incorporating these maintenance tips into your daily routine, you can extend the life of your self-tan and keep your skin looking radiant.
Troubleshooting Common Self-Tanning Issues
Even with the best preparation and application techniques, self-tanning can sometimes lead to issues like streaks, dark spots, or an uneven fade. Knowing how to troubleshoot these problems can save your tan and keep your skin looking flawless.
Here’s how to address some common self-tanning mishaps:
Streaks and Unevenness
If you notice streaks or unevenness after applying self-tanner, don’t panic. The simplest solution is to gently exfoliate the affected areas with a damp washcloth or exfoliating scrub. This helps to remove the excess tanner and blend the color more evenly. Follow up with a moisturizer to hydrate the skin and prevent further unevenness.
Dark Spots
Dark spots can occur when self-tanner accumulates in dry areas like knees, elbows, and ankles. To fix this, use a lemon juice and baking soda paste. Apply the paste to the dark spots, let it sit for a few minutes, and then rinse off. The lemon juice acts as a natural lightener, while the baking soda gently exfoliates the skin. Remember to moisturize afterward to hydrate the skin.
Troubleshooting techniques can quickly resolve common issues and maintain a perfect tan.
- Exfoliate Streaks: Gently buff away uneven areas.
- Lemon Juice for Spots: Natural lightener for dark areas.
- Moisturize After: Hydrate to prevent further issues.
By knowing how to troubleshoot common self-tanning issues, you can ensure that your tan looks flawless and natural every time.
| Key Point | Brief Description |
|---|---|
| ☀️ Prep Skin | Exfoliate and moisturize before applying self-tanner. |
| 🧤 Apply Evenly | Use a tanning mitt for a streak-free application. |
| 💧 Stay Hydrated | Moisturize daily to prolong your tan. |
| 🧼 Gentle Cleansing | Use sulfate-free cleansers to maintain your tan. |
Frequently Asked Questions (FAQs)
▼
Self-tanner usually lasts between 5 to 10 days, depending on your skin type and how well you maintain it. Regular moisturizing and gentle cleansing can help extend the life of your tan.
▼
It’s best to avoid swimming, excessive sweating, or rigorous exercise for at least 4-6 hours after applying self-tanner. These activities can cause the tan to fade unevenly or streak..
▼
No, self-tanner does not provide any protection from the sun’s harmful UV rays. Always wear sunscreen with a broad-spectrum SPF of 30 or higher when exposed to the sun.
▼
Gentle exfoliation 2-3 times a week can help maintain an even fade. Avoid harsh scrubs that can remove the tan too quickly. Focus on moisturizing to keep the skin smooth.
▼
If your self-tan is too dark, exfoliate gently with a damp cloth and apply lemon juice to lighten the color. Hydrate well to help even out the tone and avoid further tanning.
Conclusion
Achieving a flawless, natural-looking glow with self-tanner is within everyone’s reach with the right techniques and products. By following this ultimate guide, you can confidently achieve a beautiful tan in just 2 hours, ensuring you always look and feel your best without the harmful effects of the sun.


